Managing screens
Everything about your displays lives on the Screens page — the home of your dashboard.
The Screens page
When you sign in, the dashboard opens on Screens — a grid of every display on your account. From here you add, edit, organize, and monitor screens. Use Add Screen to pair a new one (see Pairing a screen).
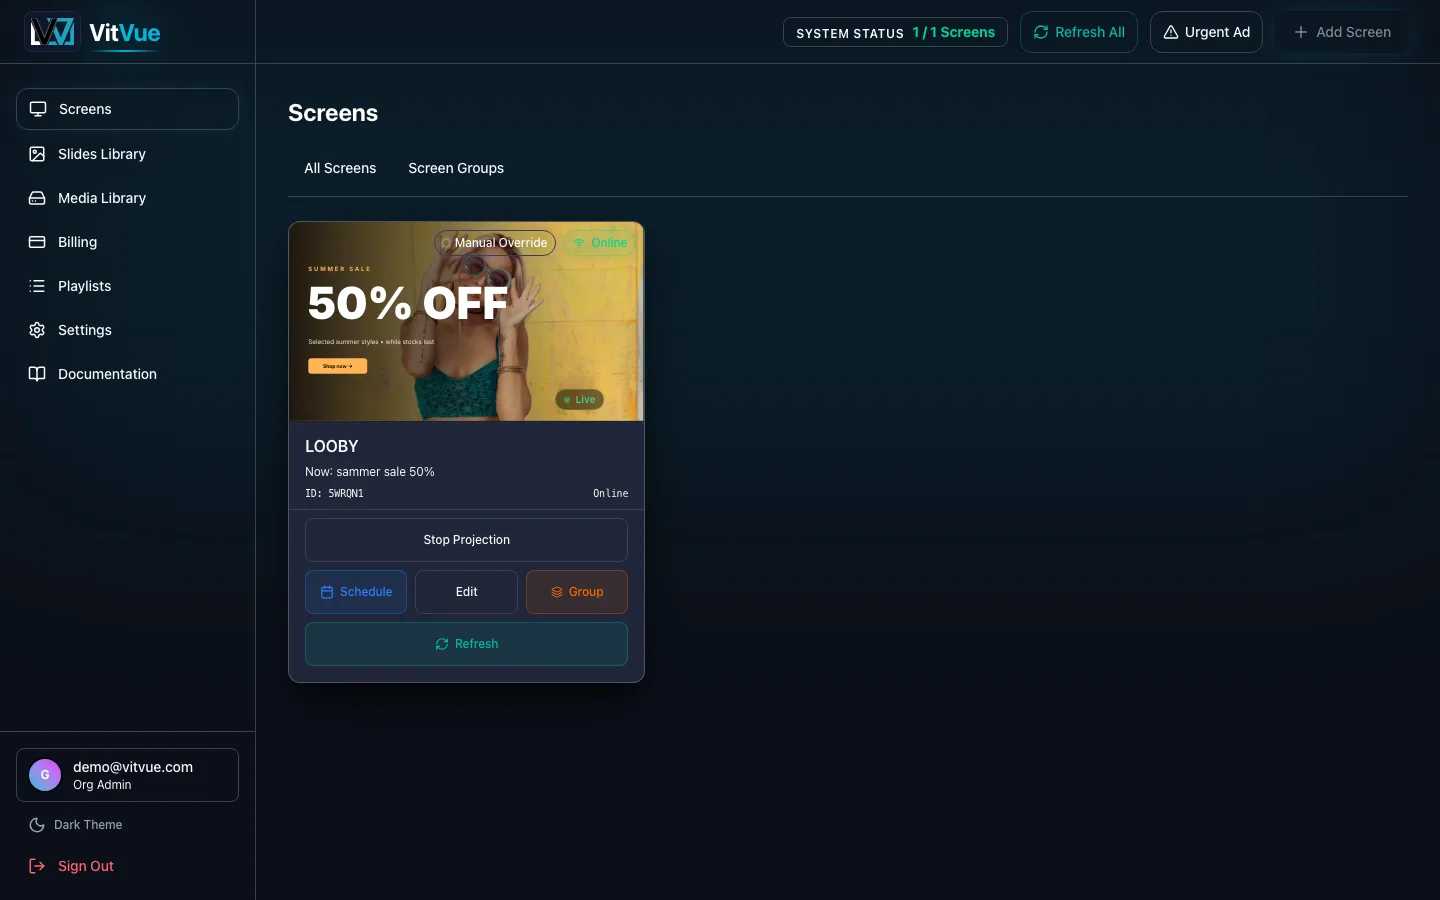
What each card does
- Schedule — the rules that decide which playlist runs on this screen, and when. See Playlists & scheduling.
- Edit — rename the screen, re-pair it to replacement hardware, or turn on casting. Clear names like "Lobby" or "Drive-Thru Menu" pay off as the fleet grows.
- Group — move the screen into a screen group.
- Refresh — tell that screen to reload now, rather than waiting for its next check-in. Refresh All at the top does the whole fleet.
- Stop Projection — appears while a slide is pinned to the screen, and hands it back to its schedule.
Urgent Ad, at the top of the page, pushes a message ahead of everything currently playing — on one screen or a whole group — until it expires or you stop it.
Orientation
Orientation belongs to the slide, not the screen. A slide is built either Landscape (1920×1080) or Portrait (1080×1920), and you set that when you create it — or change it later with the Resize button in the editor toolbar. To feed a portrait-mounted display, assign it slides built in portrait.
Online & offline status
Screens send a regular heartbeat, so the grid shows which are online right now. If a screen drops offline, it keeps playing its last downloaded content from local cache — see Troubleshooting.
Screen groups
Group related screens to manage them together:
- Assign a slide to every screen in the group in one go.
- Schedule a playlist on the group, instead of screen by screen.
- Deploy an urgent message to the whole group at once.
See Publishing & assignment for exactly how group and screen assignments resolve.
Deleting a screen
Removing a screen unpairs the device and frees it against your plan's screen limit. The device returns to its pairing screen and can be paired again later.